Parallel compression is one of those mixing techniques that separates amateur productions from professional ones. Instead of squashing your audio with heavy insert compression, you blend a heavily compressed signal with the original, untouched version. The result? Thickness and power without losing the natural dynamics that make recordings feel alive.
For producers working in their DAWs, the right parallel compression plugin makes all the difference. Some are vintage hardware emulations that add character and color to the compressed signal. Others are modern tools designed specifically for parallel processing, with built-in wet/dry controls that eliminate complex routing.
The technique works on virtually anything. Drums become punchy and powerful while keeping their transient snap,vocals sit forward in dense mixes without sounding obviously compressed and bass guitar gains weight and sustain while maintaining clarity. Even full mixes benefit from parallel compression to add cohesion and professional polish.
The plugins below cover different approaches to parallel compression, from tube-based optical designs to aggressive digital processors where each brings its own sonic character and workflow advantages, giving you options that match your mixing style and the material you’re working with.
1. Baby Audio IHNY 2
- Compatibility: macOS 10.13+, Windows 10+
- Format: VST, VST3, AU, AAX
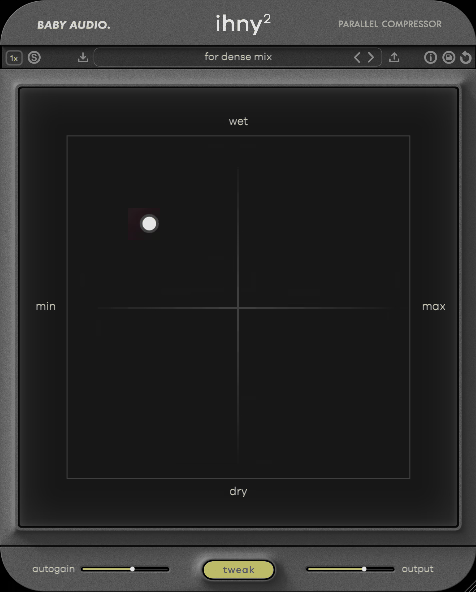
I think IHNY 2 represents one of the smartest approaches to parallel compression I’ve seen in a plugin. What stands out to me immediately is how Baby Audio designed the entire workflow around internal wet/dry blending, which means you don’t need to set up auxiliary sends or mess with routing in your DAW. Everything happens inside the plugin itself.
The SPANK control is honestly brilliant. It’s not just adding compression, it’s introducing harmonic excitement to the compressed signal before it gets blended back with your dry audio. From my experience, this makes the parallel processing feel more musical and less mechanical. When you’re working on drums or vocals, that added harmonic content helps the compressed layer sit in the mix naturally.
What I appreciate about the attack and release controls is how they respond to different source material without feeling overly technical. You can dial in fast settings that preserve transients on drums, or go slower for bass and sustained instruments where you want weight without muddiness. The plugin gives you enough headroom to push it hard without things falling apart, which is exactly what you need when you’re going for aggressive parallel sounds.
Baby Audio IHNY 2 also includes visual gain reduction metering that actually helps you understand what’s happening to your dynamics. I found that being able to see the compression at work makes it easier to dial in the right amount of processing, especially when you’re still learning how parallel compression affects different instruments.
2. FabFilter Pro-C 3
- Compatibility: macOS 10.13+, Windows 10+
- Format: VST, VST3, AU, AAX
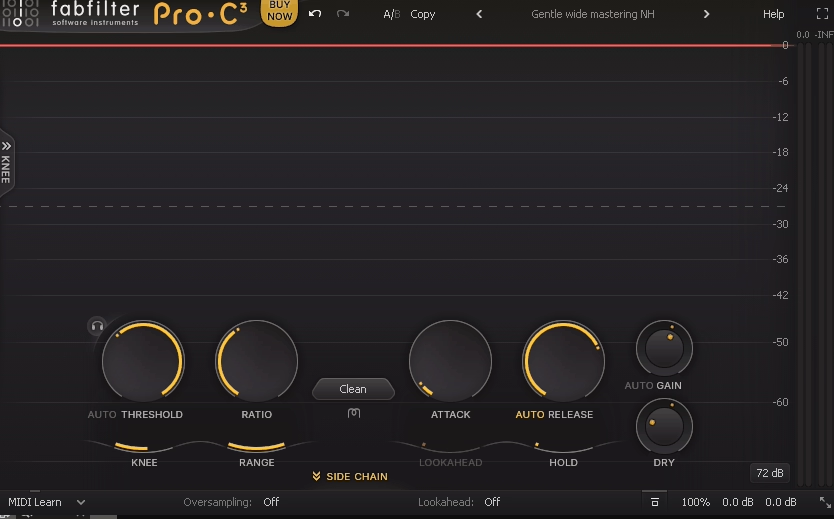
From what I can tell, Pro-C 3 takes a completely different approach than most vintage-style compressors. The interface philosophy here is all about transparency and visual feedback. You’re getting real-time spectrum analysis, detailed gain reduction metering, and a display that shows you exactly what’s happening to your frequency content as you compress.
I’m a big fan of the eight compression styles built into this thing. Each style isn’t just a different algorithm, it’s a fundamentally different compression character. The Vocal mode works beautifully for dialogue and singing, while the Mastering mode offers the kind of transparency you need when you’re processing full mixes. What I like about having these options is that you can match the compressor behavior to your source material instead of forcing everything through one sound.
The built-in mix control makes parallel compression dead simple. You set your ratio and threshold fairly aggressively, then blend in just enough compressed signal to add the density you’re after. Personally, I think the side-chain EQ section is one of the most underrated features. It lets you filter out low frequencies before they hit the detector, which keeps your bass from triggering compression that’s meant for the midrange and treble. This gives you way more control over what actually gets processed.
In general, the look-ahead feature helps with transient-heavy material like drums. It gives the compressor a few milliseconds to prepare for incoming peaks, which means you get smoother gain reduction without losing punch. The knee control lets you adjust how gradually the compression kicks in, and I noticed that a softer knee often works better for parallel processing because it makes the blending less obvious.
FabFilter Pro-C 3 also includes expert mode, which unlocks additional parameters like hold time and range limiting. At the very least, this gives you surgical control when you need it, though I’d say most parallel compression tasks work great with the standard controls.
3. Arturia Bus FORCE
- Compatibility: macOS 10.13+, Windows 10+
- Format: VST, VST3, AU, AAX
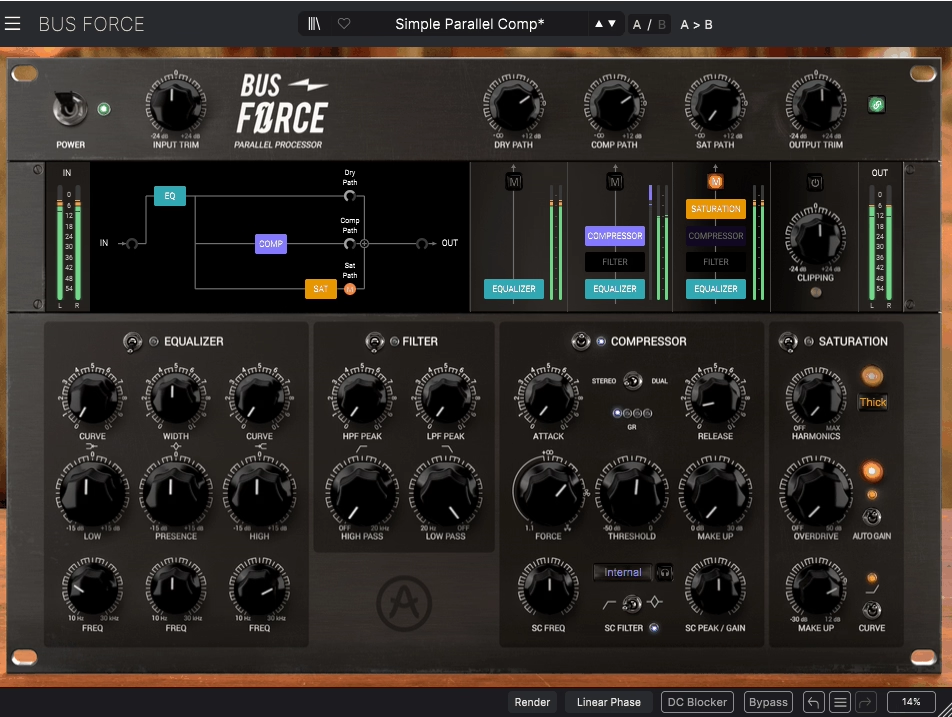
Bus FORCE was designed specifically for parallel processing from day one, which makes a huge difference in how it behaves. Rather than bolting on a wet/dry control as an afterthought, Arturia built the entire signal flow around blending compressed and dry signals. The FORCE knob determines how much parallel compression you’re applying, and it feels more intuitive than manually setting up sends and returns.
One thing I’ve noticed that sets this apart is the built-in transient shaper. You can reshape the attack of your drums while simultaneously adding parallel compression, which means you’re sculpting dynamics in two different ways at once. From my perspective, this becomes incredibly powerful on drum buses where you want to maintain that initial snap while adding sustain and body to the tail.
The plugin includes multiple compression modes that range from clean and surgical to colored and characterful. When you switch between modes, you’re not just changing the compression curve, you’re also changing the harmonic content and transient handling. I love how the saturation circuit adds another layer of tone shaping that works particularly well on rock and electronic music where you want things to feel aggressive and present.
What really impressed me was the parallel mix meter that shows you the balance between your dry and compressed signals visually. You know, it’s one of those features that seems small but actually helps you make better decisions faster. The adjustable knee control lets you determine how gradually the compression engages, and I found that softer knee settings blend more naturally for most parallel applications.
Arturia Bus FORCE also offers mid-side processing capabilities, which means you can apply different amounts of parallel compression to the center and sides of your stereo image. That being said, this opens up creative possibilities for making mixes feel wider while keeping low end tight and focused in the middle.
4. Waves CLA 76
- Compatibility: macOS 10.13+, Windows 10+
- Format: VST, VST3, AU, AAX
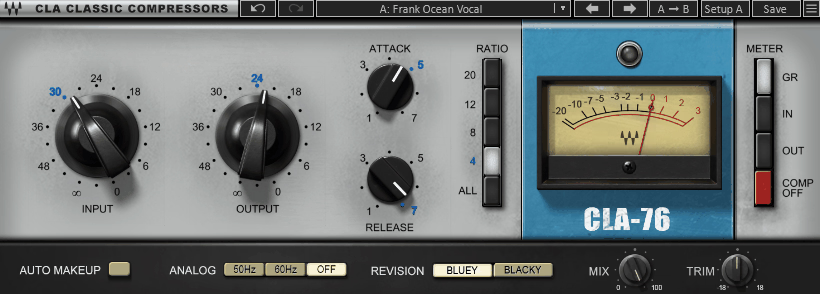
The 1176 compressor has been a studio standard for decades, and honestly, this emulation captures why engineers keep reaching for it. I feel like CLA 76 nails that fast, aggressive character that makes vocals sit forward in a mix and drums hit with real impact. You’re getting the sound that’s been on countless hit records, now available with the convenience of a plugin.
What sets this apart is how the ratio buttons interact when you engage multiple settings at once. The famous “all buttons in” mode creates a unique compression curve that’s become legendary for parallel drum processing. It’s aggressive and pumpy in ways that modern clean compressors rarely achieve. I mean, this mode gives you that explosive quality on room mics and overheads that makes drums feel larger than life.
The simplicity actually works in your favor here. Six knobs and four ratio buttons give you everything you need without overwhelming you with options. The input and output controls let you drive the circuit as hard as you want, while the attack and release buttons offer enough variation to match different source material. When you’re setting up parallel compression on a send, the sonic signature adds excitement that transparent compressors just can’t deliver.
I realized that the fixed attack and release times might seem limiting at first, but they’re actually sweet spots that the hardware became famous for. The fast attack options work great for catching transients, while the slower settings let more of the initial hit through before the compression kicks in. On top of that, the analog-style metering gives you a clear visual reference for how hard you’re hitting the compressor.
The plugin also includes analog modeling that adds subtle harmonic distortion and saturation as you drive the input harder. From what I can tell, this is part of what gives Waves CLA 76 its character and makes it sit so well in parallel processing chains.
5. Softube Tube Tech CL 1B Mk II
- Compatibility: macOS 10.13+, Windows 10+
- Format: VST, VST3, AU, AAX
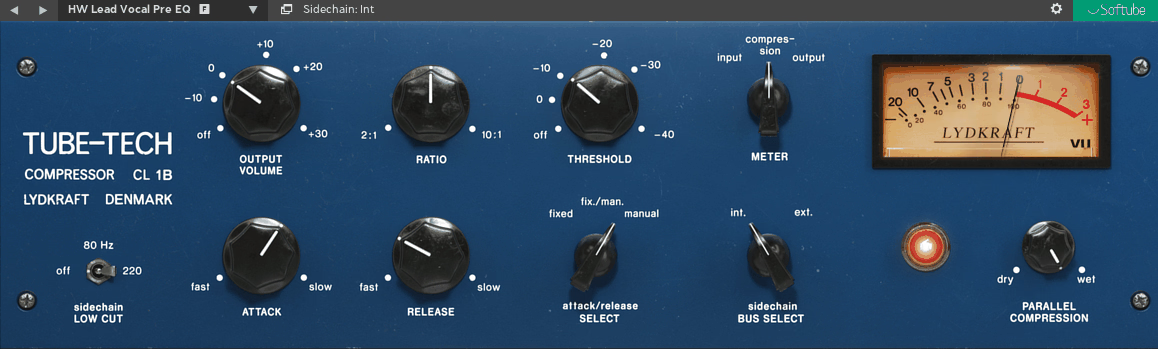
Tube-based optical compression brings a completely different flavor to parallel processing. I’d say the CL 1B Mk II responds to your audio in a smooth, musical way that feels more like gentle persuasion than aggressive control. In my opinion, this makes it perfect when you want to add weight and presence without making things sound obviously compressed.
The optical circuit naturally creates slower attack times that preserve transients beautifully. When you’re working with bass guitar or vocals, this characteristic means you keep the initial attack clear while the body of the note gets thicker and more sustained. What I appreciate is how the release behavior adapts to the program material in ways that fixed-time compressors can’t match, creating compression that breathes with your music.
Five fixed ratio settings might seem limiting at first, but they’re actually sweet spots that the hardware became famous for. The 2:1 and 4:1 ratios work great for most parallel compression tasks, giving you enough control without getting lost in endless parameter adjustment. Maybe it’s just me, but I find that limitations like this actually speed up decision making and get you to good results faster.
The tube circuitry adds subtle harmonic richness that accumulates nicely when you’re processing multiple tracks. I noticed that this warmth doesn’t overpower the original signal but rather fills in the spaces and makes everything feel more cohesive. The gain reduction meter responds to your audio in this organic way that mirrors how the optical element behaves, which helps you understand what the compressor is doing at a glance.
At the same time, the threshold and makeup gain controls are straightforward and musical. You can dial in the amount of gain reduction you want, then bring the level back up with the output control. Plus, the low frequency emphasis that optical compression naturally provides works beautifully on bass instruments and full mixes. Using Tube Tech CL 1B Mk II in parallel gives you vintage warmth without sacrificing the clarity of your original signal.
6. Baby Audio Parallel Aggressor
- Compatibility: macOS 10.13+, Windows 10+
- Format: VST, VST3, AU, AAX
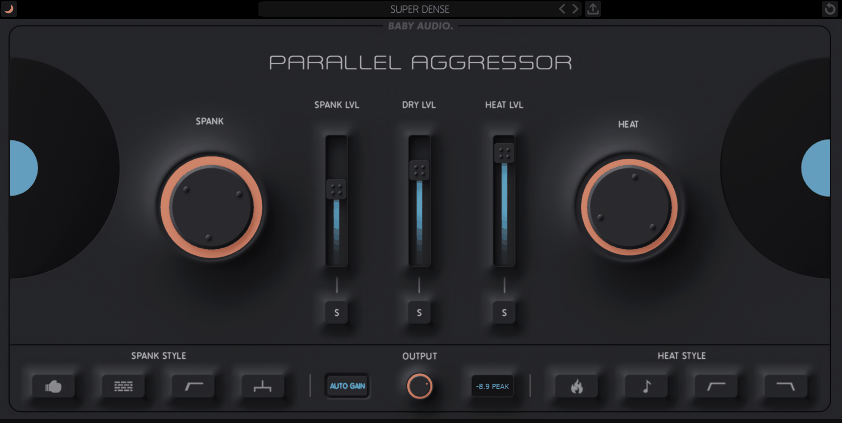
Here’s a plugin that’s completely honest about what it does. Parallel Aggressor is built from the ground up for one purpose: making your parallel compression workflow as fast and effective as possible. The entire interface revolves around blending aggressive compression with your dry signal, eliminating the need for complex routing in your DAW.
Three compression modes give you different flavors of intensity, and I must say each one has a distinct character. SPANK mode delivers that classic punchy sound that works great on drums and percussion. HEAT mode adds more saturation and harmonic color, which I found works beautifully on bass and guitars where you want warmth and grit. HUGE mode creates maximum density for when subtle definitely isn’t on the agenda, perfect for electronic music and heavy rock production.
What stands out to me is the tone controls built into the compressed path. You can shape the frequency content before it gets blended back with your dry signal, which means you can brighten up dull sources or warm up harsh material while maintaining the dynamic character of your original audio. This integration of EQ and compression in the parallel chain saves you from stacking multiple plugins.
The visual feedback shows you exactly how much gain reduction you’re applying and how the wet/dry balance is set. I love how everything is right there on one screen without menu diving or hidden controls. The attack and release controls are simplified but effective, giving you enough adjustment to match different source material without overwhelming you with options.
In addition to that, the output limiter prevents the parallel blending from causing peaks or distortion. Because of this, you can push the compressed signal harder without worrying about clipping. When you need parallel compression that’s both powerful and easy to dial in, Baby Audio Parallel Aggressor delivers without making you work for it.
7. UAD Empirical Labs EL8 Distressor
- Compatibility: macOS 10.13+, Windows 10+
- Format: VST, VST3, AU, AAX (UAD hardware required)

The Distressor has earned its reputation as one of the most versatile compressors ever made, and to be honest, this UAD version captures all the features that make it special. You get access to multiple compression curves, harmonic distortion modes, and a British mode that fundamentally changes the character of the processing. This flexibility makes it ideal for parallel compression across different source material.
What really makes this shine in parallel applications is the distortion section. You can add second or third harmonic distortion to your compressed signal before blending it back with the dry path. From my experience, this creates thickness and presence that pure compression alone can’t achieve. The Nuke mode pushes things into aggressive, obviously compressed territory that works great when you want maximum impact on drums or bass.
The attack and release controls offer precise timing adjustment that lets you dial in exactly how the compressor responds to transients. I’d recommend fast attack times with medium release for adding sustain to drums in parallel, while slower settings help glue together mix buses without losing punch. The ratio control goes from gentle 1.5:1 all the way up to 20:1, giving you options for everything from subtle enhancement to heavy limiting.
Detector high pass filter filters out low frequencies before they trigger the compressor, which means your bass doesn’t cause pumping in the midrange and highs. On the flip side, you can use the detector input control to feed an external side-chain signal, opening up creative ducking and keying effects.
The image link control determines how the stereo channels interact, and I found that the stereo mode works best for preserving width in parallel applications. In fact, the multiple knee options let you choose between hard knee for more obvious compression or soft knee for transparent gain reduction. Working with the UAD Empirical Labs EL8 Distressor in parallel gives you studio-grade processing with the flexibility to match any musical style.
Freebies
1. Kiive Audio Xtressor NUKE
- Compatibility: macOS 10.11+, Windows 7+
- Format: VST, VST3, AU, AAX
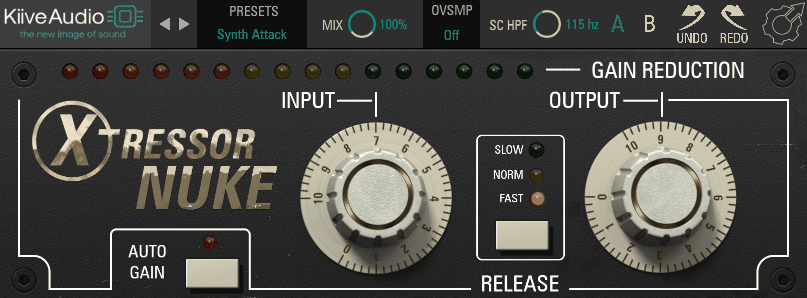
The compression algorithm is specifically tuned for parallel processing applications. You’re getting a sound that’s designed to be blended with dry signal rather than used as an insert effect. Which is why you can push it harder than you normally would, because the extreme settings actually work when mixed back at lower levels. The built-in saturation adds grit that helps the compressed signal cut through dense mixes.
NUKE takes the concept of aggressive parallel compression and runs with it. This free plugin doesn’t hold back, delivering the kind of smashed, in-your-face sound that works perfectly on drum buses and mix buses when you want things to hit hard. At first glance, the interface keeps things simple with just the essential controls you need.
What you get here is straightforward functionality without the learning curve of more complex compressors. Threshold, ratio, attack, and release controls do exactly what you expect them to do. I suggest starting with the ratio around 4:1 or higher for that aggressive parallel sound, then adjusting the threshold until you’re getting substantial gain reduction. The output gain lets you match levels so you’re making fair comparisons as you adjust the blend.
Right off the bat, I noticed that the fast attack times work great for catching drum transients and adding punch. The release control shapes how the compression releases between hits, and I found that faster release times create more pumping and energy, while slower settings sound smoother and more controlled. For the most part, this plugin excels at making things sound bigger and more aggressive without subtlety.
For producers and engineers who want that aggressive parallel compression sound without spending money, Kiive Audio Xtressor NUKE delivers impressive results that compete with paid alternatives. As a matter of fact, the simplicity becomes an advantage when you just want to add power to your mixes quickly.
2. Kiive Audio XTMax
- Compatibility: macOS 10.11+, Windows 7+
- Format: VST, VST3, AU, AAX
When you need more control than single-band parallel compression can offer, Kiive Audio XTMax gives you the precision to shape dynamics and tone simultaneously across the frequency spectrum. In the bigger picture, this kind of multiband parallel processing can make the difference between a mix that feels professional and one that sounds amateur.
The three-band design lets you set different compression characteristics for lows, mids, and highs. You might use gentle compression on the bass frequencies to add sustain, more aggressive settings on the mids to bring out body, and minimal processing on the highs to preserve air and detail. Each band has its own attack, release, and ratio controls, giving you the flexibility to treat each frequency range as its own parallel compression task.
The crossover frequencies are adjustable, which means you can match the processing to your source material instead of being locked into fixed split points. I feel like I should mention that getting the crossover points right makes a huge difference in how natural the compression sounds. If you split too high or too low, you might end up with frequency imbalances that make the processing obvious.
The visual feedback shows you what’s happening in each band simultaneously, making it easier to understand how your compression choices are affecting the overall sound. At the core of it, this is about having transparency into your processing so you can make informed decisions. The solo function for each band lets you hear what’s happening in isolation, which helps you dial in the perfect settings.
One thing I’ve noticed is that the parallel mix control for each band gives you even more flexibility. You can blend different amounts of compression in different frequency ranges, which opens up creative possibilities. In other words, you might use heavy parallel compression on the lows for power, moderate parallel compression on the mids for body, and light parallel compression on the highs for presence.
XTMax combines parallel compression with multiband processing in ways that give you surgical control over your dynamics. Instead of compressing your entire signal equally, you can target specific frequency ranges while leaving others untouched. I believe this becomes incredibly useful when you want to add weight to the low end while keeping the high end open and natural.
Wrapping Up
Each of these plugins brings something different to your parallel compression workflow. Overall, whether you need the vintage warmth of tube compression, the surgical precision of modern processing, or the aggressive character of classic hardware emulations, you have options that fit your mixing style. The key is understanding what each tool does best and matching it to the material you’re working with.
At the end of the day, parallel compression works because it gives you the best of both worlds: the power and presence of heavy compression combined with the natural dynamics of your original signal. In the long run, mastering these tools will transform how your mixes translate across different playback systems and help you achieve that professional polish that separates great mixes from amateur ones.
Hello, this blog is about more than just chorus, bass and synths. In fact, I started it to cover best VST plugins and Kontakt libraries, so you have easier time finding the right tools and instruments for your music production needs, mixing, as well as mastering. New tools and instruments are constantly evolving and need to get in front of audience, because even some of the best brands like Antelope Audio aren’t talked about enough – that’s what I want to change. I want to promote plugins that are less known but are perfectly relevant for certain topics.